|
Installing TPIS Headers, Random Technology Catalytic Converters,
& Random Technology X-Pipe
[NOTE: Click the thumbnail picture to view a higher resolution
version. Use your browser's "Back" button to return here]
Purpose
MORE HORSEPOWER! Better exhaust note. No more exhaust jingle! :-)
Tools Required
- 10mm Deep Socket
- 10mm Socket
- 15mm Deep Socket
- 15mm Socket
- 1/2" Socket
- 3/8"
Torque Wrench
- 7/8" Open End Wrench
- Anti-Seize Compound
- New Oil Filter
- Thread-Lock
Installation
Before Beginning:
* Disconnect negative cable on battery
* Lift all four wheels off the ground to provide enough clearance to
work under the car
1. Remove secondary O2 sensors.
Using a 7/8" Open End Wrench, remove both O2 sensors
located after the catalytic converters
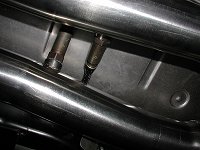
2. Unbolt flange between the factory manifold and catalytic
converters.
You will have to use a 15mm deep socket to remove the three
15mm nuts
on each manifold attaching the manifolds to the intermediate pipe.

3. Unbolt intermediate pipe.
There are two 15mm bolts in the front, two 13mm bolts on
the exhaust hangers
after the H pipe, and four 15mm bolts at the rear exhaust flanges
that will have to be removed. The whole assembly is fairly heavy, so if you
have a helping hand, it will help. Since I did my install alone, I used a
jack to hold up one side of the assembly while I unbolt it. It would be
helpful if someone assisted you in holding the intermediate pipe. Once you
have the whole thing removed, tie the rear muffler pipes to the top. You
will see a bolt on each side of the frame where you can tie it up to.

4. Remove primary O2 sensors.
Now is a good time to remove the front O2 Sensors on the manifolds from
underneath the car. It's much easier doing it this way since the
intermediate pipe is out of the way. The O2 sensors on
the both manifolds will require a 7/8" Open End Wrench just like the
O2 sensors on the intermediate pipes. Disconnect the connectors as well.
Each connector is clipped onto the frame of the car. You will have to pop
the connectors off the frame so that when you install the TPIS Headers, the
harness will have enough slack to allow the O2 sensor to be mounted.
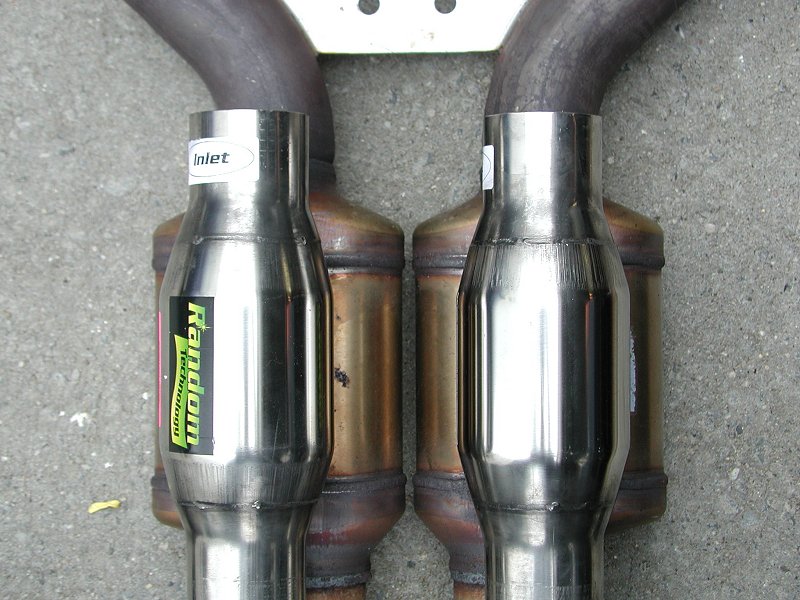
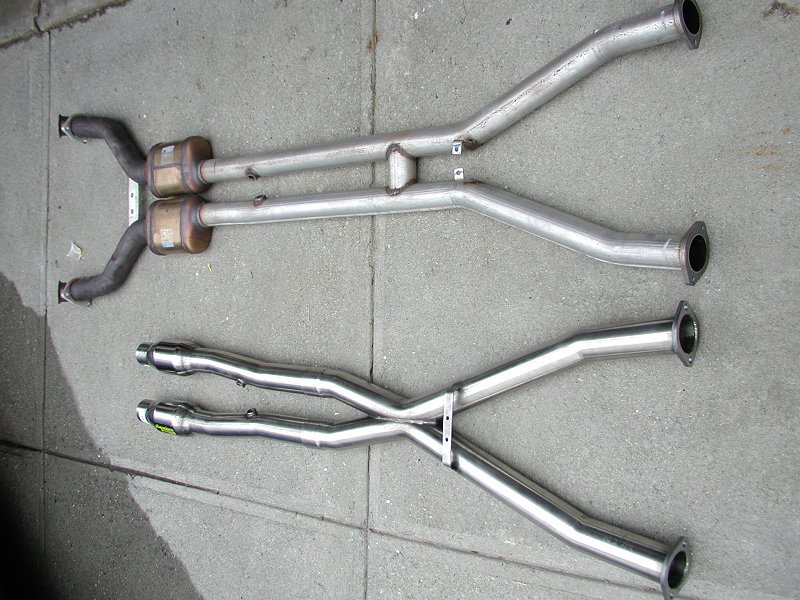
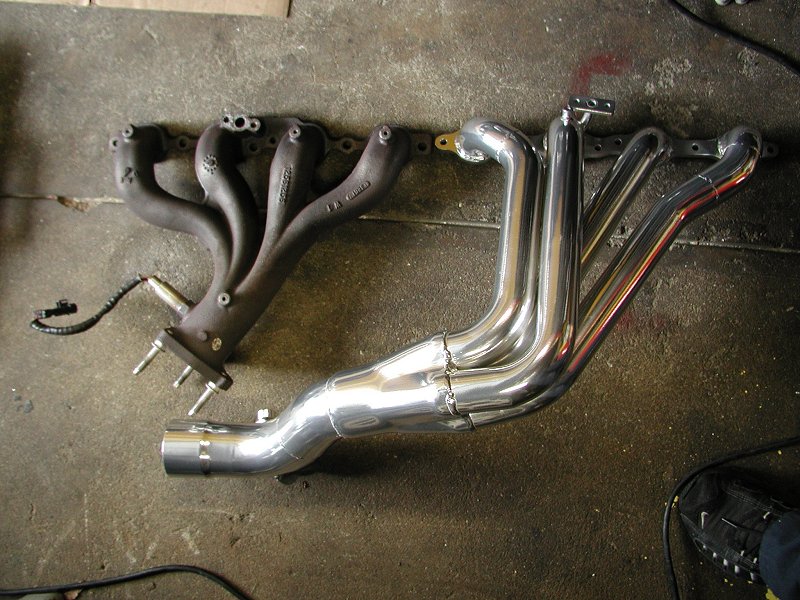
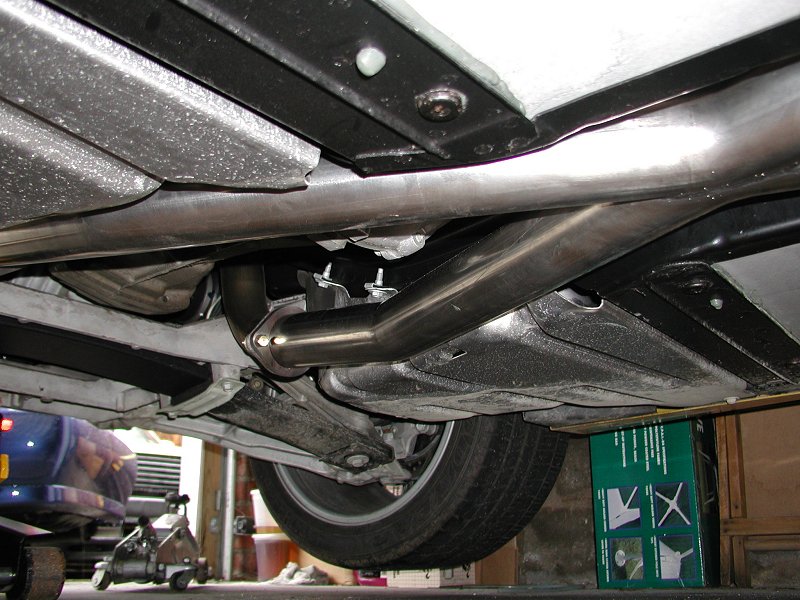
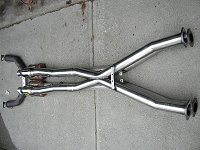
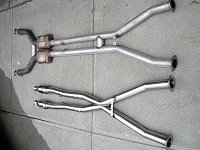
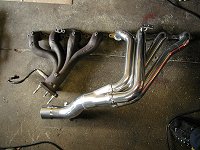
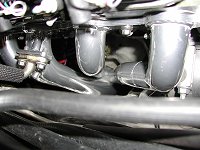
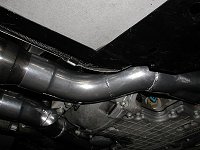
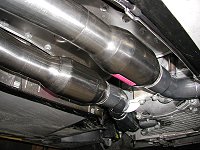
5. Test fit new catalytic converters with the X Pipe.
This is a good time to compare the factory intermediate pipes with the
new set. Everything in this set up is a slip fit kit and requires no
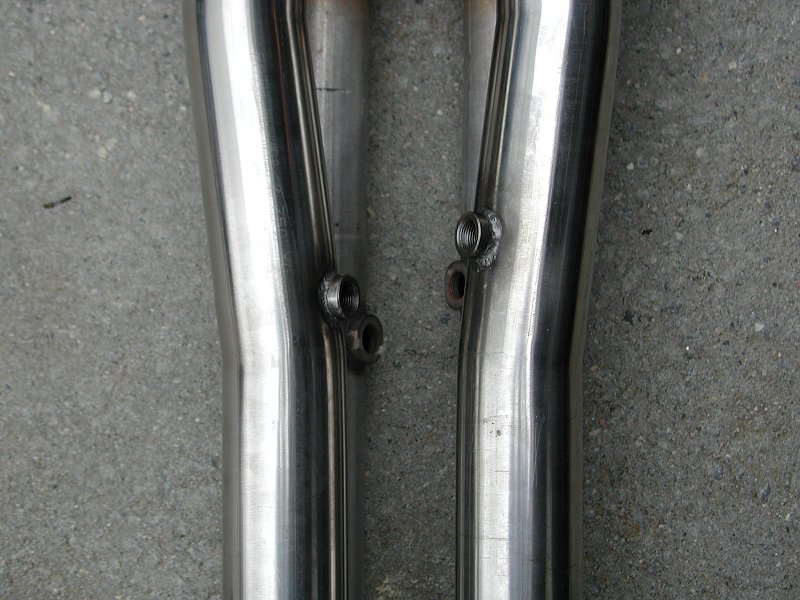
welding. A complete bolt on kit. While test fitting everything, note where the O2 bungs are and how they are angled up a
little. Notice how the right O2 bung is more forward then the left O2 bung.
Also make sure you have no trouble slip fitting the inlets on the new Random
Technology high flow catalytic converters to the TPIS Headers.


RIGHT (PASSENGER) SIDE MANIFOLD REPLACEMENT WITH NEW
TPIS HEADERS
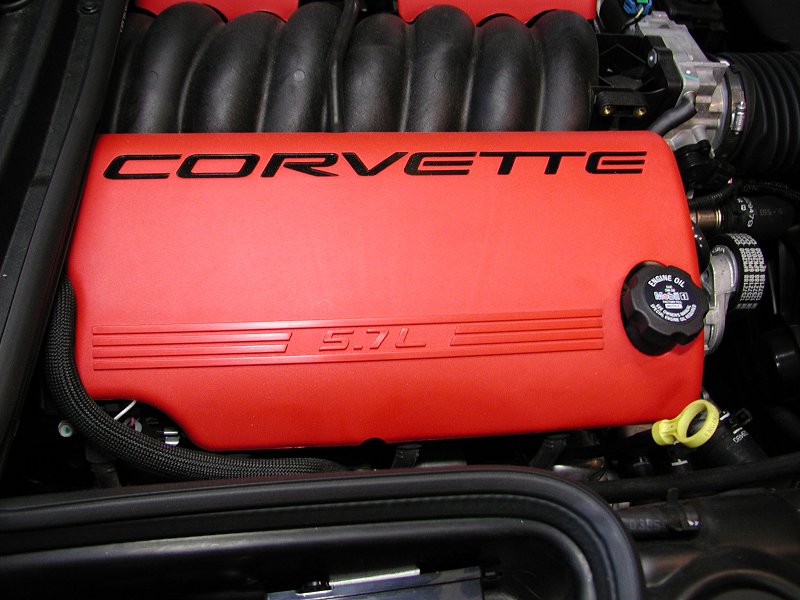
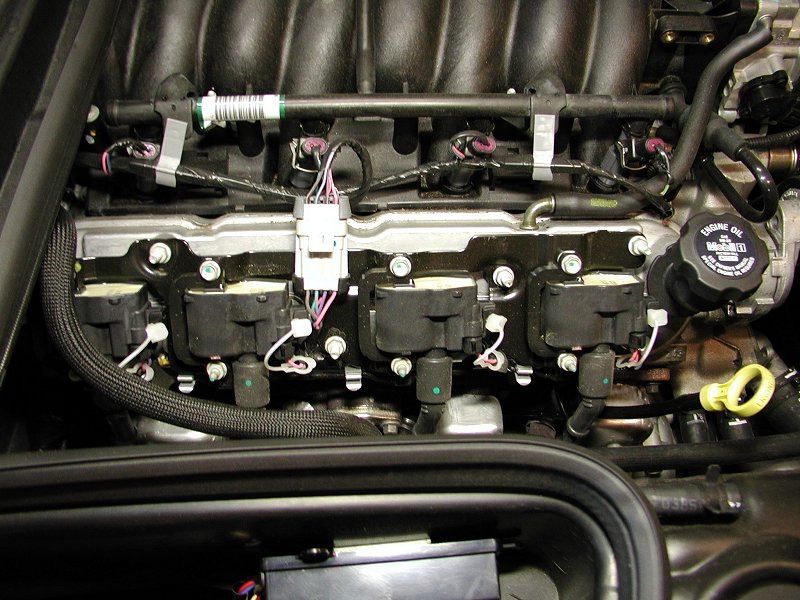
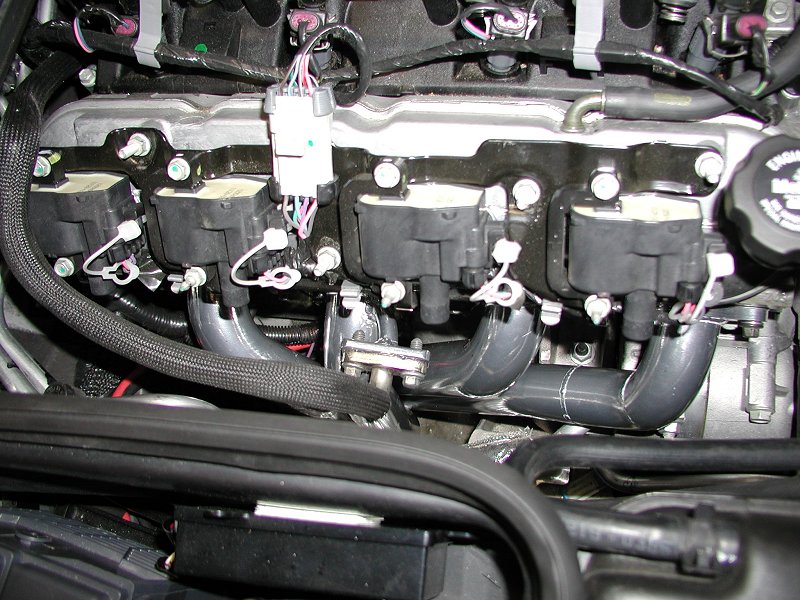
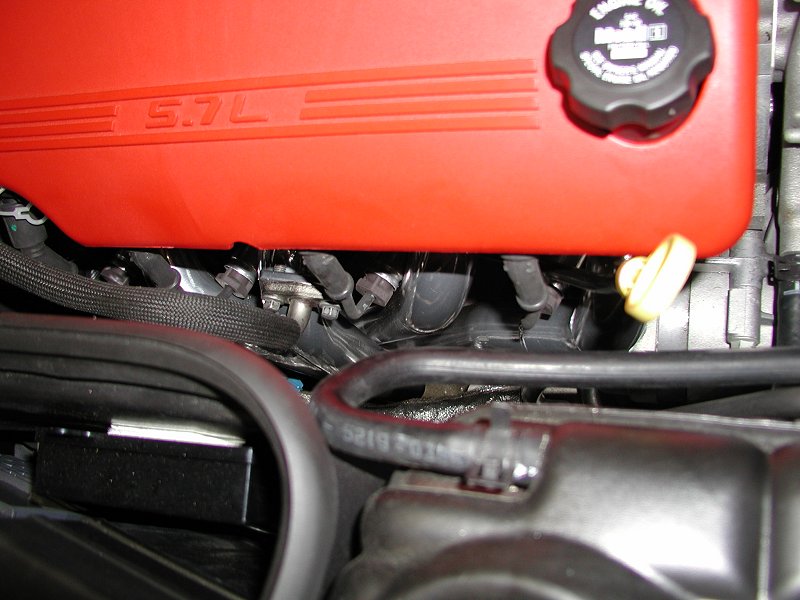
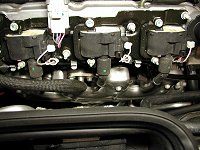
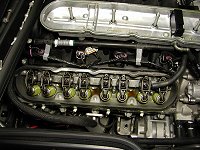
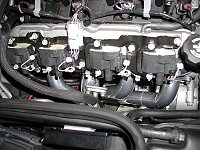
6. Remove fuel rail cover.
The fuel rail cover just pops off. On this side, you will have to
remove the oil filler cap first. Once removed, the
ignition coils will be exposed. Put the oil filler cap back in place so you
don't drop anything in there.

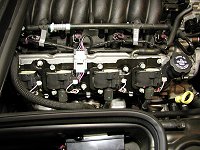
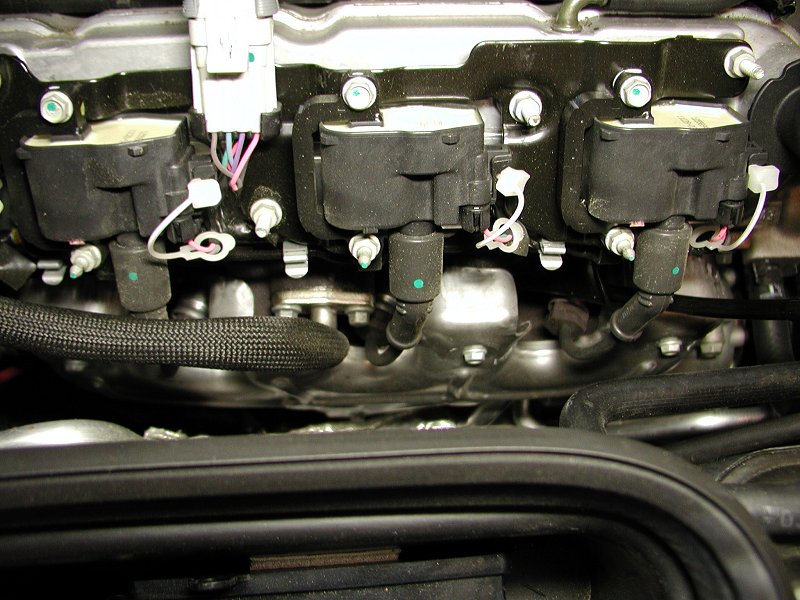
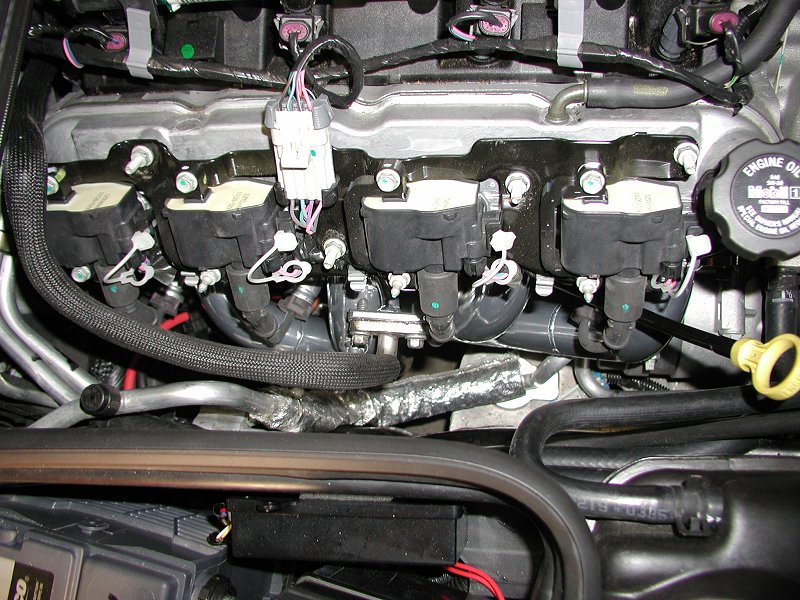
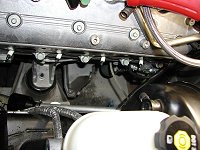
7. Remove spark plug wires and unbolt ignition coils.
Remove the spark plug wires from the ignition coils first then you will
require a 10mm deep socket to remove the five 10mm bolts
holding the ignition coil bracket to the valve cover. Once removed, just
lift the ignition coil assembly off the valve cover and set it aside. Remove
the remaining spark plug wires from the spark plugs.
8. Unbolt AIR pipe.
Using a 10mm socket, unbolt the two 10mm bolts holding the
secondary air injection (AIR) pipe to the factory manifold then carefully
move it out of the way trying not to bend it too much. Be careful not to
lose the factory AIR pipe gasket. This will be reused later.

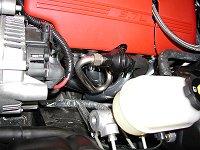
9. Unbolt motor oil dip stick tube.
Using a 15mm socket, unbolt the dip stick tube and look way down
the tube at were it is inserted. Gently pull it up and out of the way while
looking at where it comes out. This way you'll know where to reinsert it
later.
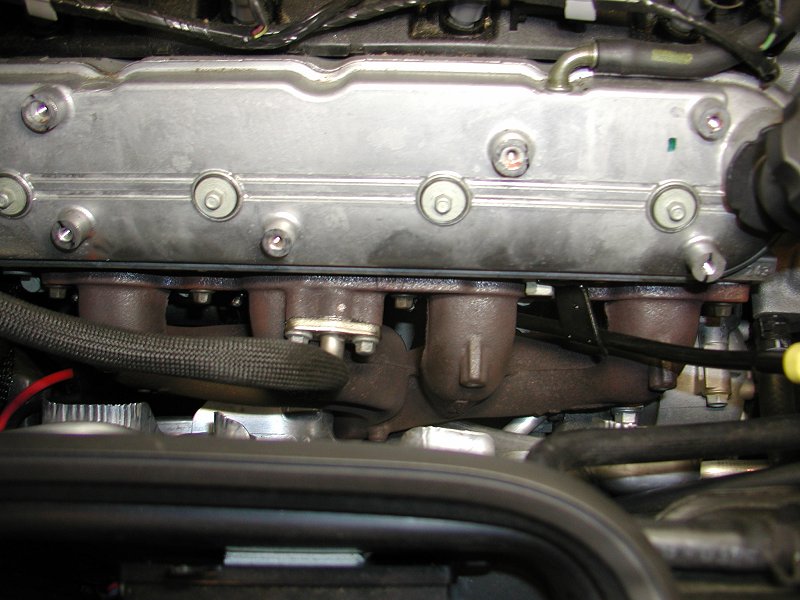
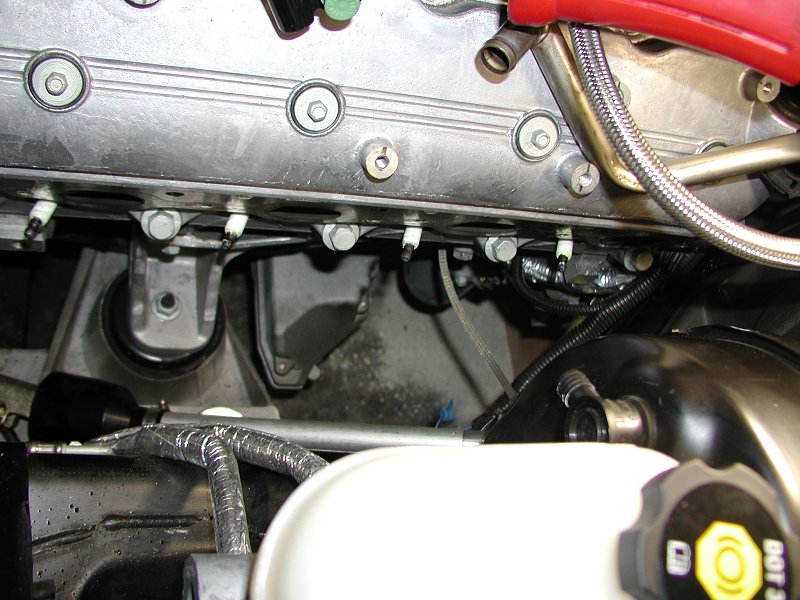
10. Unbolt factory manifold.
Using a 10mm socket, unbolt the six 10mm bolts from the
manifold. It might help if you also removed the heat shield covering the
manifold. There are four 10mm screws holding it in place. You should
now be able to simply lift the manifold out.
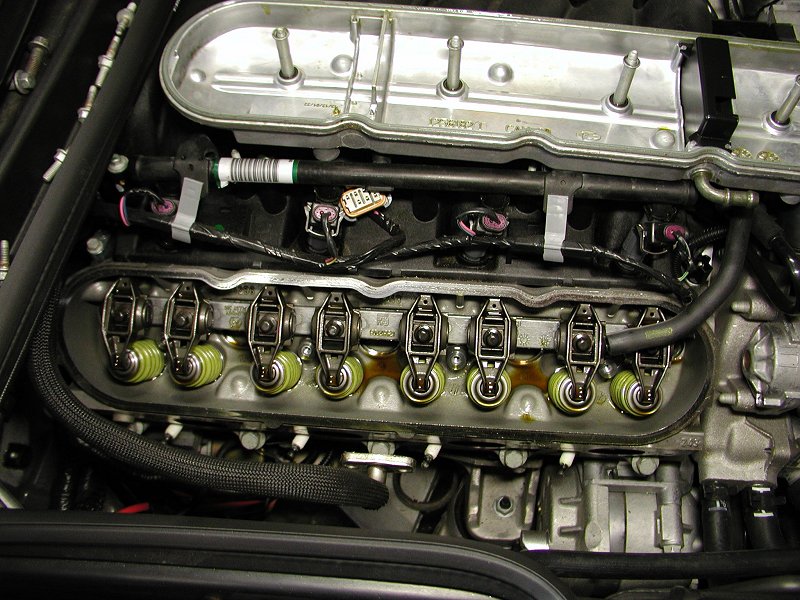
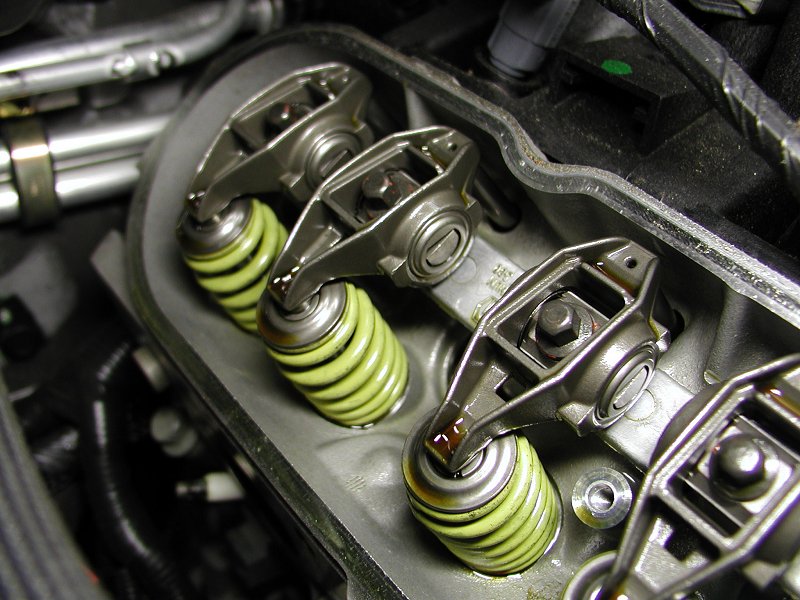
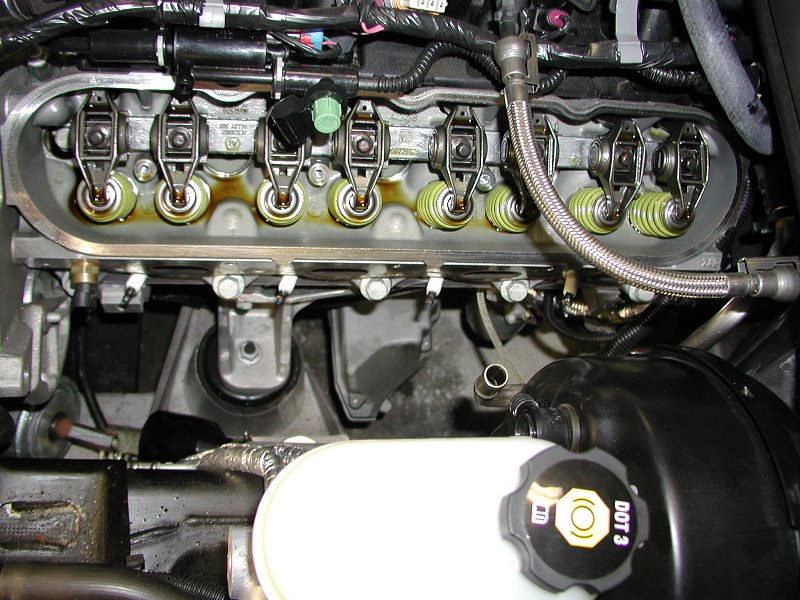
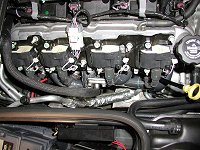
11. Remove valve cover.
In order to have enough room to slip the TPIS down, you will have to remove
the valve covers. There are four 10mm bolts holding the cover down.


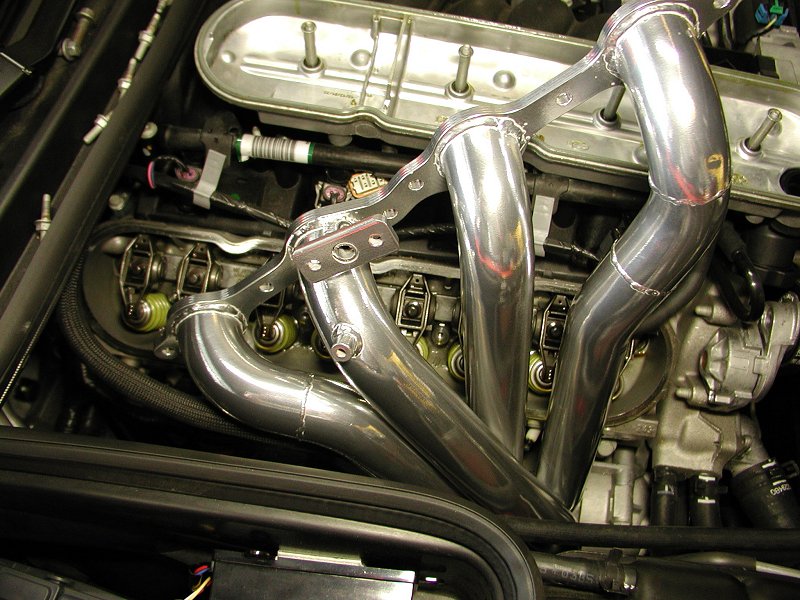
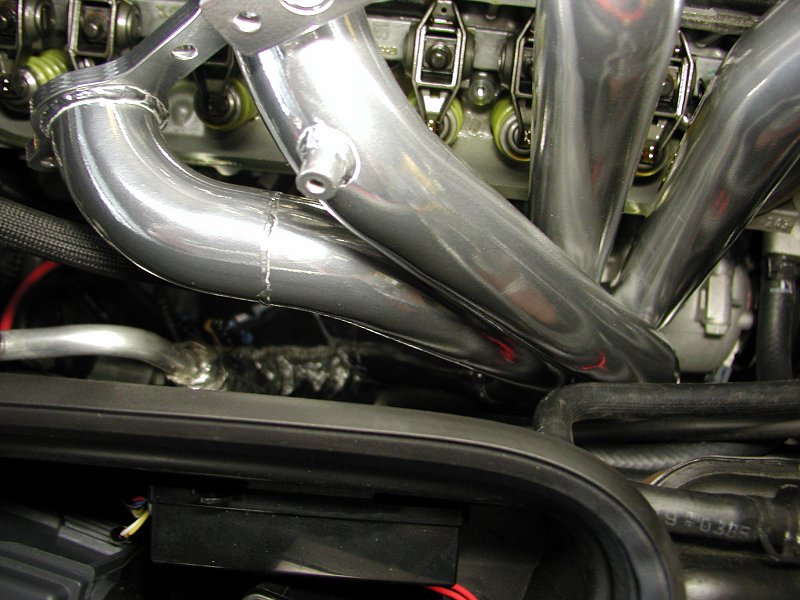
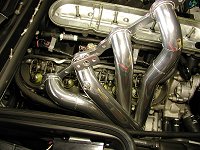
12. Slip TPIS headers in place.
Carefully maneuver the TPIS headers down without scratching the coating on
the headers.
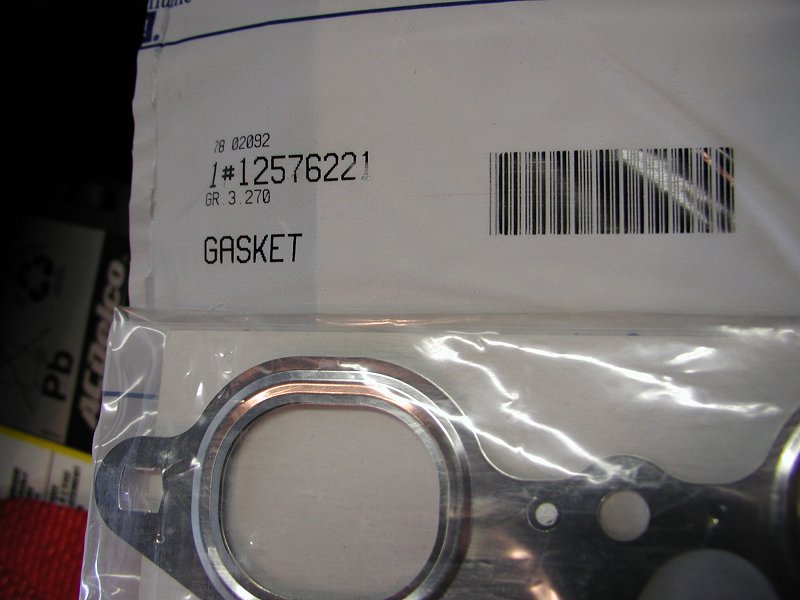
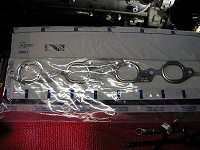
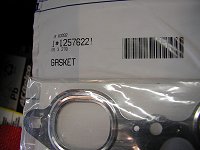
13. Install gasket and tighten TPIS Headers.
If your old gasket is in good shape you can reuse it, but I chose to
purchase a new one. Note the markings on the gasket which shows you which
side is down. The side with the crush rings on them should face the headers
while the flat side faces the engine. While having someone hold the headers
in place, (I wish I had a second pair of hands when doing my install) slip
the gasket in place and reuse the factory manifold bolts. Make sure you use
the locking washers that were included with the TPIS Headers. Make
sure all old thread lock is cleaned off the threads of the factory manifold
bolts then apply a small dab of new thread lock. You will need a 10mm
socket to tighten the bolts.
*Tighten the factory exhaust manifold bolts a first pass to 15 Nm (11
lb ft). Make sure the lock washers and thread lock is already applied.
Start with the center two bolts, then alternate side to side working your
way outward.
*Now make a final pass to 25 Nm (18 lb ft) again starting with the
center two bolts, then alternate side to side working your way outward.
Once bolted down, on the right side you will see a tab sticking out from
the manifold gasket. Just bend it inward to the side of the cylinder head.

14. Reinstall motor oil dip stick tube.
Check the O ring on the dip stick tube to make sure it's ok and lubricate it
with some clean motor oil. Locate the hole where it should go down and
simply push it down carefully. It should not require much force. Once in
place, torque it down to 25 Nm (18 lb ft) using the factory 15mm
bolt.
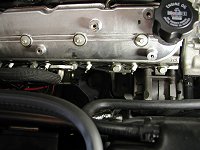
15. Reinstall valve cover.
Check the gasket around the valve cover to make sure it is ok. It is
recommended to change the gasket but it should be fine to reuse once. Align
the valve cover and tighten down the 4 10mm bolts to 12 Nm (106 lb
in) working from the center out.
16.
Reinstall AIR pipe.
Inspect the AIR pipe gasket and if it's still good, reuse it. Align
the AIR pipe and gasket over the TPIS Header's AIR pipe inlet. Tighten
the two 10mm bolts to 20 Nm (15 lb ft).
17. Reinstall ignition coils & spark plug wires.
Align the ignition coil bracket on top of the valve cover. Inspect the
factory 10mm bolts and clean off any excess thread lock from the threads.
Apply a small dab of thread lock to the threads of the bolts. Now reinstall
all five 10mm bolts tightening them to 12 Nm (106 lb in). Now
you can reinstall all four spark plug wires.
 18.
Reinstall fuel rail cover.
Inspect everything is good then reinstall the fuel rail cover. Time
to sit back, relax, and enjoy your accomplishments before you start on
the other side. :-)
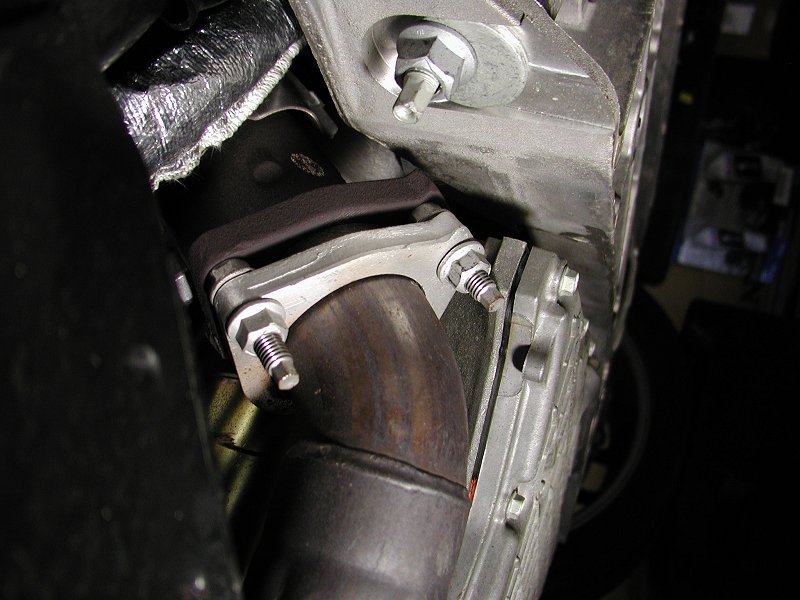
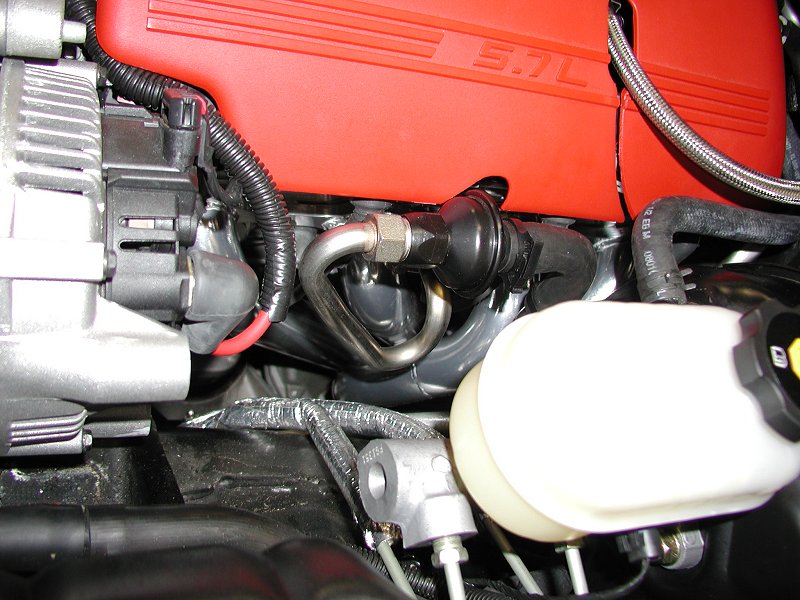
 19.
Bolt lower portion of TPIS header.
Now you can crawl under the car again and using the factory 15mm
bolt, bolt the bottom of the header near the slip fit fitting to the
factory mount. It should line up perfectly. Torque to 37 lb ft (50
Nm).
20. Reinstall primary O2 sensor.
Reinstall the O2 sensor using a
7/8" Open End Wrench on the new TPIS Header. Make sure you use on
anti-seize compound around the threads of the O2 sensor then tighten
it down on the header. You don't really have to torque it but if you
wish, you can torque it down to 42 Nm (30 lb ft). Once in place,
reconnect the wire harness.
 LEFT (DRIVERS) SIDE
MANIFOLD REPLACEMENT WITH NEW TPIS HEADERS
Note, this side is very similar to the right side, but some additional
components will have to be removed in order to get the headers in. 20.
Remove fuel rail cover.
The fuel rail cover just pops off. Be careful when sliding it away from
the fuel line. 21.
Remove alternator belt.
Using a 15mm socket, rotate the tensioner pulley then slide the
belt off the alternator. (Much easier to do if you had a helping hand) 22. Remove alternator.
Remove the two 15mm bolts holding the
alternator in place. You can disconnect the alternator and set it aside
of simply rotate it up and out of the way. 23. Remove spark plug wires and unbolt ignition coils.
Remove the spark plug wires from the ignition coils first then you will
require a 10mm deep socket to remove the five 10mm bolts
holding the ignition coil bracket to the valve cover. Once removed, just
lift the ignition coil assembly off the valve cover and set it aside. Remove
the remaining spark plug wires from the spark plugs. 24. Unbolt AIR pipe.
Using a 10mm socket, unbolt the two 10mm bolts holding the
secondary air injection (AIR) pipe to the factory manifold then carefully
move it out of the way trying not to bend it too much. Be careful not to
lose the factory AIR pipe gasket. This will be reused later. 25. Unbolt factory manifold.
Using a 10mm socket, unbolt the six 10mm bolts from the
manifold. It might help if you also removed the heat shield covering the
manifold. There are four 10mm screws holding it in place. You should
now be able to simply lift the manifold out.
 26. Remove valve cover.
In order to have enough room to slip the TPIS down, you will have to remove
the valve covers. There are four 10mm bolts holding the cover down.
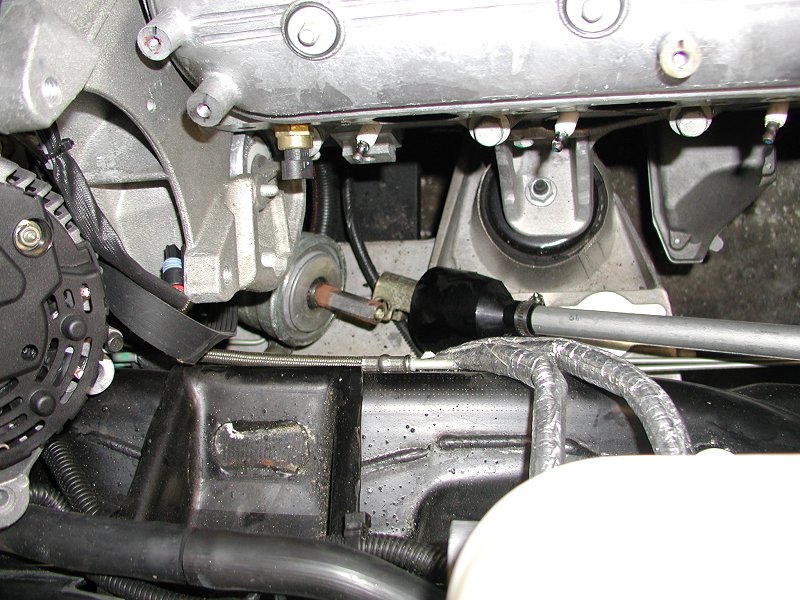
 27.
Unbolt steering shaft coupling bolt.
Using a 15mm socket, simply unbolt the lower coupling bolt from
the steering shaft and drop it
down. This is necessary to allow enough room to work the TPIS headers
down.
 28.
Removed oil filter.
Your motor oil filter will have to be removed in order to have clearance
for the header to drop down in place. 29. Slip TPIS headers in place.
Carefully maneuver the TPIS headers down without scratching the coating on
the headers.
30. Install gasket and tighten TPIS Headers.
If your old gasket is in good shape you can reuse it, but I chose to
purchase a new one. Note the markings on the gasket which shows you which
side is down. The side with the crush rings on them should face the headers
while the flat side faces the engine. While having someone hold the headers
in place, (I wish I had a second pair of hands when doing my install) slip
the gasket in place and reuse the factory manifold bolts. Make sure you use
the locking washers that were included with the TPIS Headers. Make
sure all old thread lock is cleaned off the threads of the factory manifold
bolts then apply a small dab of new thread lock. You will need a 10mm
socket to tighten the bolts. *Tighten the factory exhaust manifold bolts a first pass to 15 Nm (11
lb ft). Make sure the lock washers and thread lock is already applied.
Start with the center two bolts, then alternate side to side working your
way outward.
*Now make a final pass to 25 Nm (18 lb ft) again starting with the
center two bolts, then alternate side to side working your way outward.
Once bolted down, on the right side you will see a tab sticking out from
the manifold gasket. Just bend it inward to the side of the cylinder head.
31. Reinstall steering shaft.
Align the lower coupler on the steering shaft and using a 15mm socket,
tighten the bolt to 25 lb ft (34 Nm).
32. Reinstall valve cover.
Check the gasket around the valve cover to make sure it is ok. It is
recommended to change the gasket but it should be fine to reuse once. Align
the valve cover and tighten down the 4 10mm bolts to 12 Nm (106 lb
in) working from the center out.
33.
Reinstall AIR pipe.
Inspect the AIR pipe gasket and if it's still good, reuse it. Align
the AIR pipe and gasket over the TPIS Header's AIR pipe inlet. Tighten
the two 10mm bolts to 20 Nm (15 lb ft).
34. Reinstall ignition coils & spark plug wires.
Align the ignition coil bracket on top of the valve cover. Inspect the
factory 10mm bolts and clean off any excess thread lock from the threads.
Apply a small dab of thread lock to the threads of the bolts. Now reinstall
all five 10mm bolts tightening them to 12 Nm (106 lb in). Now
you can reinstall all four spark plug wires. 35. Reinstall alternator.
Set the alternator in place and reinstall the two 15mm bolts and
torque to 37 lb ft (50 Nm). Reconnect any harness that might have
been removed earlier when the alternator was disconnected. If the engine
harness cable was removed, reinstall it and torque the nut to 10 lb
ft (13 Nm). 36.
Reinstall alternator belt.
Using a 15mm socket, rotate the tensioner pulley then slide the
belt back on the alternator. (Again, much easier to do if you had a
helping hand). Check the belt is routed correctly then move on to the
next step. 37. Reinstall fuel rail cover & Reconnect Battery.
Be careful again when sliding the cover over the fuel line. Once done,
you can reconnect your battery.
38. Bolt lower portion of TPIS header.
Time to crawl under the car again. Using the factory 15mm bolt,
bolt the bottom of the header near the slip fit fitting to the factory
mount. Torque to 37 lb ft (50 Nm).
39. Reinstall primary O2 sensor.
Reinstall the O2 sensor using a
7/8" Open End Wrench on the new TPIS Header. Make sure you use on
anti-seize compound around the threads of the O2 sensor then tighten
it down on the header. You don't really have to torque it but if you
wish, you can torque it down to 42 Nm (30 lb ft). Once in place,
reconnect the wire harness. 40. Reinstall Oil Filter.
You should know how to install an oil filter, so no need to go into
details here. Installing Random Technology
Catalytic Converters and X-Pipe
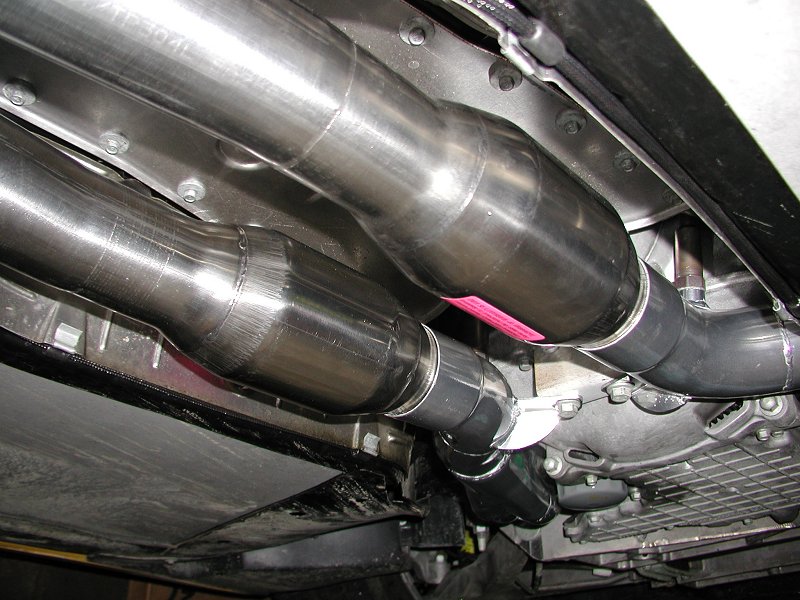
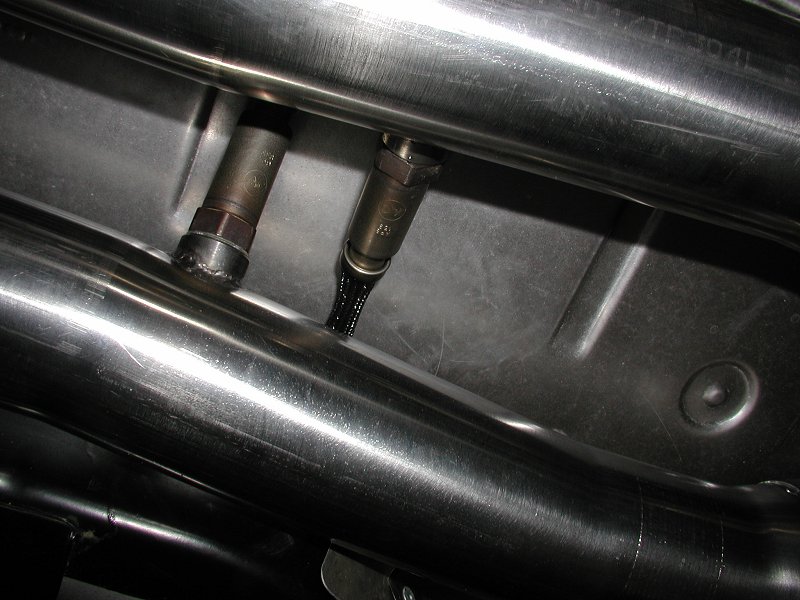
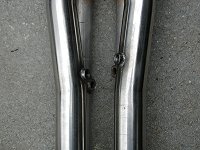
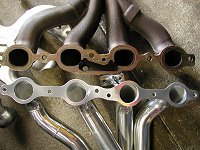
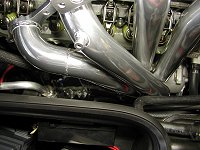
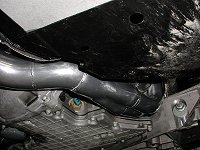
41. Slip Catalytic Converters into TPIS Headers.
Using the picture below as a reference, take note on which is the left
and which is the right catalytic converter. The drivers side (left)
catalytic converter has the O2 sensor bung further back towards the rear
of the car. The passenger side (right) catalytic converter has the O2
sensor bung more forward towards the front of the car. Also take note at
how they are angled up slightly.
Now
that you have determined which side each goes, slip them into the TPIS
Headers.
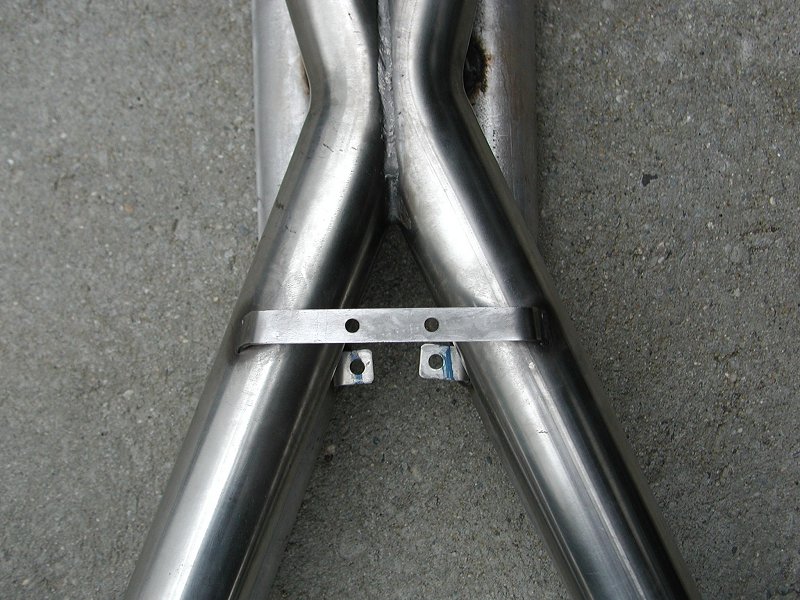
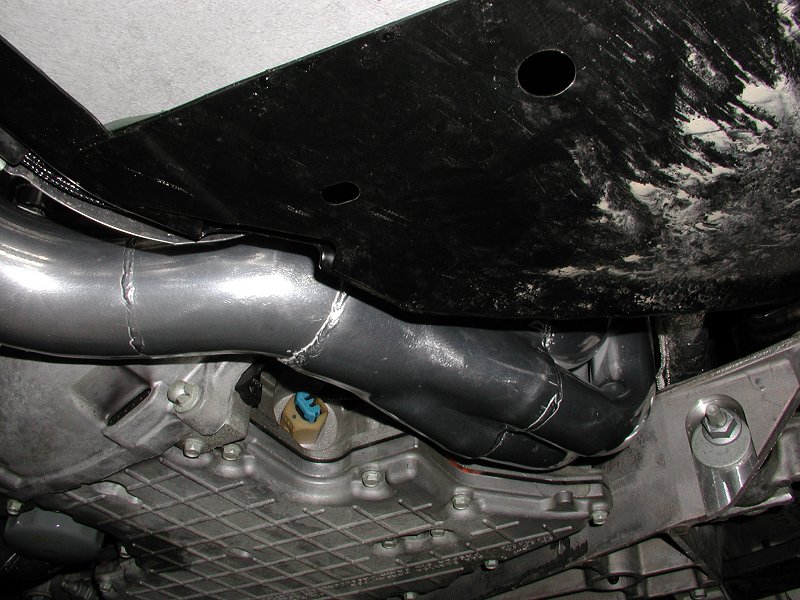
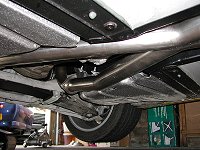
 42.
Slip X-Pipe in place.
The Random Technology X-Pipe should slip right into the catalytic
converter pipes with little trouble.
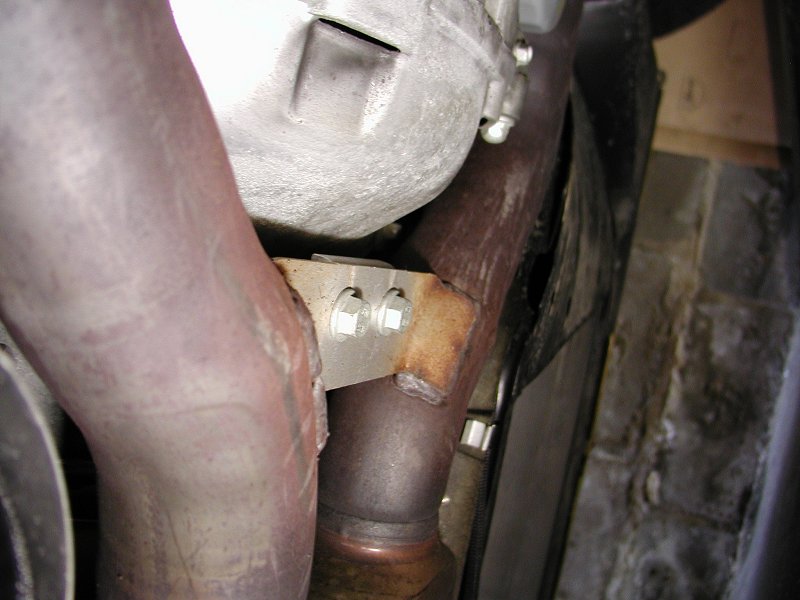
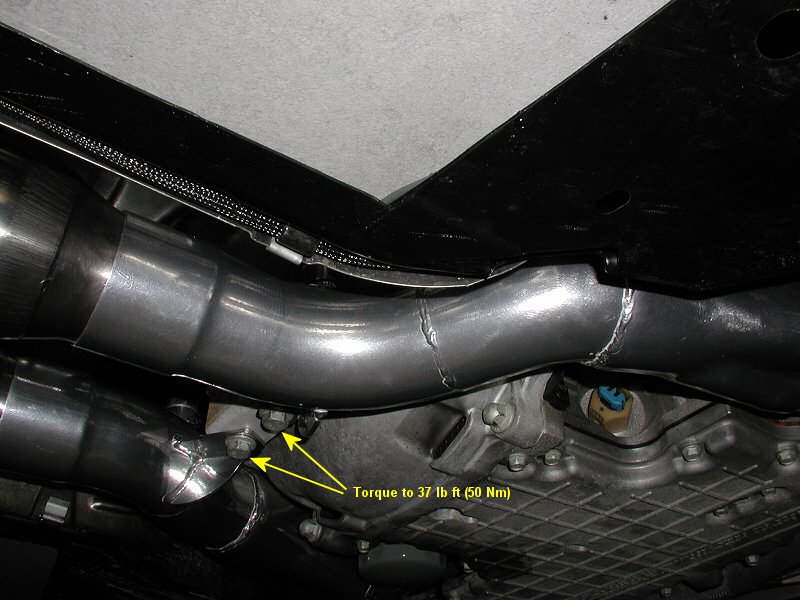
43. Bolt exhaust hangers to X-Pipe.
Tighten the two exhaust pipe hanger lower bolts in the rear section of
the X-Pipe using a 1/2" socket and torque to 37 lb ft
(50 Nm).
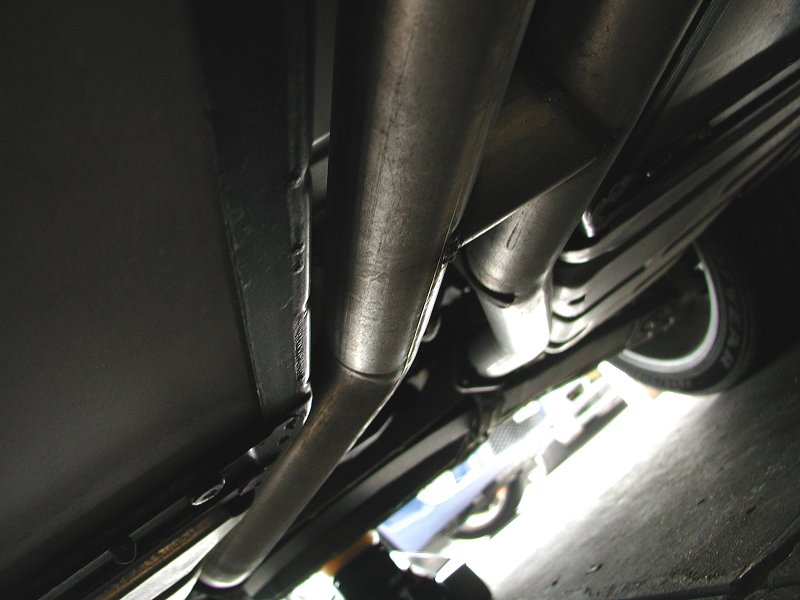
44. Bolt X-Pipe to muffler pipes.
Install the rear section (muffler side) of the X-Pipe to the muffler pipes
by tightening the 4 15mm bolts to 37 lb ft (50
Nm). Note, two bolts per side.
45. Reinstall secondary O2 sensors.
Apply some anti-sieze compound to the threads of the two oxygen
sensors removed earlier and reinstall them on the intermediate pipe. Using a
7/8" Open End Wrench torque to 30 lb ft (42 Nm). Replace
the clips on the oxygen sensor harness if removed earlier. That's it,
you are done. Go out and enjoy!!
This page was last updated on
06/23/2009 by Kevin. |